How to Add Zendesk Chat to My Website
How to Add Zendesk Chat to My Website

So, your search has led you to our lair!😜 Welcome! We know you are here in the hunt for Zendesk knowledge, more specifically for a guide on how to add the Zendesk Chat Widget to your company’s site. Take a scroll down our question guide and find what you need to set up a customer service chat by the end of the day.
First of all, we bet you’re wondering:
Does Zendesk Have a Chat Feature?🤔
Yes, it does! Let’s quickly clear out what the Zendesk app is about. Zendesk Messaging, formerly known as Zendesk Chat, is accessible through the Zendesk Suite and enables your team to engage with customers in live chats, with full conversation histories available at all times. All this from all the online social mediums your company is active on such as Facebook, Facebook Messenger, Instagram, Whatsapp, Line, Telegram, Twitter etc. Using the messaging feature from Zendesk, the customer assistance team can have conversations in the chat window through both Zendesk Support and the Chat app without leaving the support user interface. Pretty cool, right?! OK, moving on!
How Does Zendesk Chat Work?🤖
We’ll explain as simply as possible! Zendesk Chat is cross-platform. As we said before, it allows you to manage all your conversations from one place, while your customers reach out to you from many different devices, or even in your app (on mobile SDK). Also, the Zendesk Support Web Widget can be embedded on any webpage, so you can take this worry out of your way.
Now, there are two app functionality instances you need to know of:
While In an open Chat
The window opens displaying controls for you to assist the customer and with which you can perform all the tasks needed as if they were in the Chat dashboard.
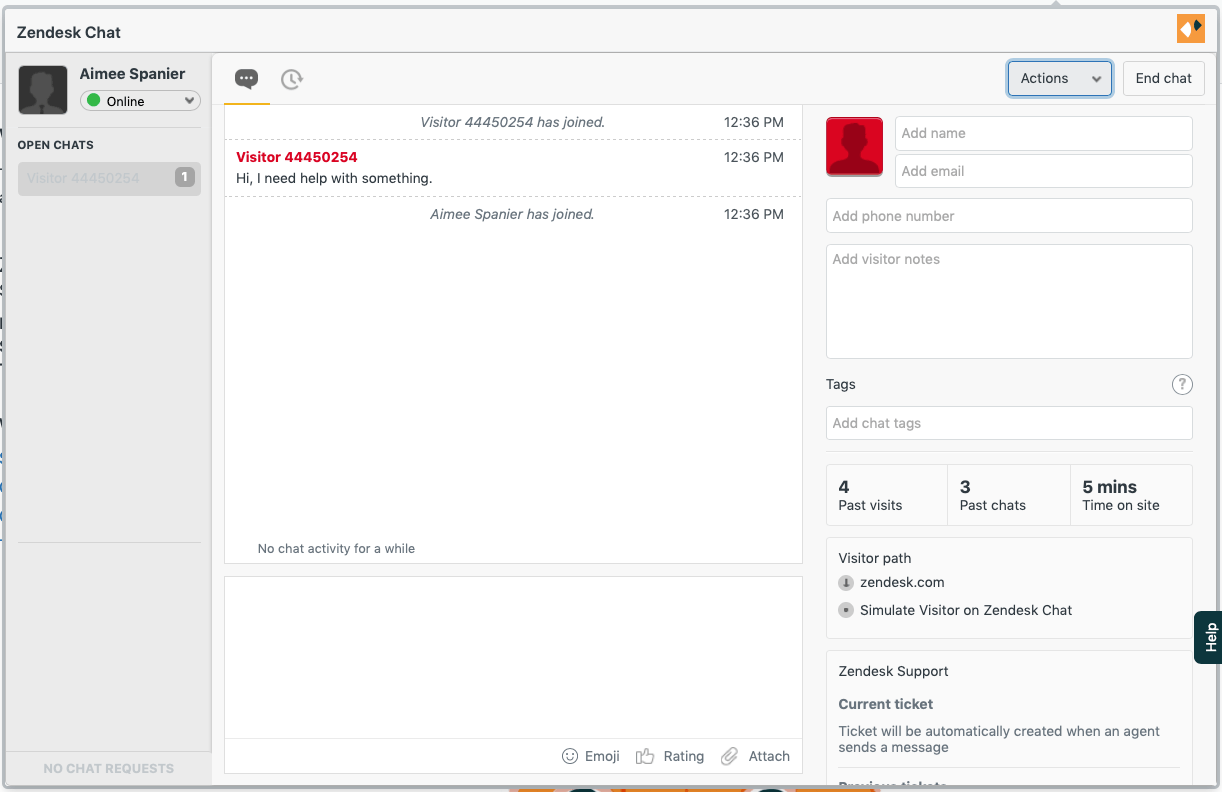
2. With No active Chats
If you have no active chats, an empty chat window appears. From the left-side column, you can perform the following tasks:
You can set your chat availability by using the drop-down menu Online, Away, and Invisible. More info about configuring chat availability you can find here.

You can open a chat window by clicking the button at the bottom of the menu for any incoming messages.

How Do I Enable Chat On Zendesk?🔧
Finally! Let’s get your tools, and start working! The Zendesk Chat app is available for download here through the Zendesk Marketplace.
AND NOW, WE PRESENT The 4 sacred steps to installing the app😅
Once you downloaded your Zendesk Chat App, click the Install button at the top of the page.
Enter your account information and click the Sign in button.
On the installation page, customize the following areas:
Title: Enter a name for the app.
Sign in on load: Automatically sign agents into the Chat app when they sign in to Support.
Enable role restrictions?: Here you can restrict access of certain agents to the app.
Enable group restrictions?: This can restrict access to the app to agents in specified groups.
4. Click Install. If you are new to Chat, an introductory walkthrough appears when installation is complete.
For reconfiguration or uninstalling the app, you can access it from your My Apps management page in Zendesk Support.
☝️One more important thing here is The ZENDESK CHAT SCRIPT
*Before your visitors can start chatting with you, you’ll need to add the Chat widget to your site by embedding the Chat widget script in the HTML source code of one or more pages.
To add the Chat widget to your web page follow these 4 simple steps:
From the dashboard, select Settings > Widget;
then click the Getting Started tab;
Copy the embed script, as shown in the example below:

⚠ In the source code of the web page, paste the embed script between the page's head tags. You can paste it either right after the opening <head> tag or right before the closing </head>. If you are concerned about page load performance, we recommend placing the snippet at the end of the <body> rather than the <head>.
4. Save and publish the page.
And Voilà! 🎉The widget should be visible after reloading the page in a browser.
How to Configure the Zendesk Live Chat on Your Website?
The world is a better place when everything is a match, right?! Well, this configuration brings a personal look and feels closer to your company’s website. And that can be done by modifying the following widget elements.
Note: If you're using a Legacy Chat version, see (Legacy Chat) Customizing the appearance of your widget.
These can be modified via the Chat dashboard, found under the Appearance tab.
Chat Window, includes the title bar text or mobile widget configurations.
Concierge is what Chat visitors see before connecting to an agent.
Chat Badge, shows how the widget looks before a chat is started.
☝️click the links for details on how to modify each element
Does Zendesk Integrate With WordPress?📜
Yes, it does! You may have it on every page of your WordPress site, or you can use a template tag to place it where you want it, allowing users to browse your knowledge base, chat with an agent, or submit a ticket.
How Do I Integrate Zendesk Chat in WordPress?🔗
Integrating the Zendesk Chat in WordPress is fairly easy. For installing Zendesk Support for the WordPress plugin you have to take these 5 steps. The final steps! We swear! 😅 And you’re good to go!
Log in to your WordPress site as an Administrator;
In the dashboard, select Plugin > Add New;
Select Upload;
Click Browse to select the file you downloaded;
Click Install Now.
Asking questions is the first step toward solving your problems. We hope our guide on How to Add the Zendesk Chat App to Your Website has all the answers you need. Make sure you don’t overlook the extra notes for an easier installation process.

DO YOU want TO OPTIMISE YOUR ZENDESK?
WE HAVE 8 AMAZING TIPS to share
👇
Also, If you have any feedback or other questions, we’d love to hear them.
You can send an email at dominic@roca.work if anything.